Tag Archives: yeast

gedeckter apfelmuskuchen mit streuseln

Meine Oma ist eine hervorragende Köchin, Bäckerin und Gastgeberin. All die Rezepte, welche sie in ihrem reichen Erfahrungsschatz hütet – allerdings nicht aufgeschrieben hat, dürfen natürlich nicht  verloren gehen. Daher habe ich mir schon längere Zeit vorgenommen, diese zu sammeln und zu archivieren. Dazu gehören zum Beispiel die Breiten Nudeln mit Apfelmus. Ein anderer ihrer Klassiker ist der gedeckte Apfelmuskuchen, und der geht so:

Zutaten:

Teig:

  • 1/2 Würfel frische Hefe (gut 20g)
  • 160 ml lauwarme Milch
  • 450 g Mehl
  • 110 g Butter
  • 80 g Zucker
  • 1 Prise Salz

Füllung:

  • etwa 600-650 ml Apfelmus
  • nach Belieben: etwas Zimt

Streusel:

  • 150 g Butter
  • 150 g Zucker
  • 200 g Mehl
  • etwas lauwarme Milch zum Bestreichen

Mehl in eine große Schüsssel geben, und in die Mitte eine Vertiefung machen. Auf dem Rand den Zucker, das Salz und die Butter in kleinen Stücken verteilen.

Hefe in die Vertiefung bröckeln, mit etwas lauwarmer Milch anrühren. Eine Viertelstunde abgedeckt stehen lassen.

Alles mit der restlichen lauwarmen Milch zu einem geschmeidigen Teig verkneten. 45-60 Minuten abgedeckt an einem warmen Ort gehen lassen.

Backofen auf 180°C vorheizen.

Aus Butter, Zucker und Mehl Streusel kneten, ggf. noch kurz in den Kühlschrank stellen.

Wenn der Teig gut gegangen ist, in zwei Teile teilen (etwa 3/5 zu 2/5). Das größere Stück für den Boden ausrollen und auf ein gefettetes Backblech legen, dabei den Rand hochziehen. Apfelmus darauf verteilen, wer mag streut noch etwas Zimt darüber.

Den zweiten Teil des Teigs ebenfalls ausrollen und als Decke auf den Kuchen legen. Das geht ganz gut mit dem Teigroller als Transportmittel, außerdem sollte die Teigplatte etwas größer als das Backblech sein, das läßt Spielraum für Korrekturen.

Die Teigplatte mit etwas lauwarmer Milch bestreichen, dann Streusel darauf verteilen.

Im heissen Ofen knapp 40 Minuten* backen, falls die Streusel schon zu dunkel werden Temperatur gegen Ende verringern.

* Ich traue mich eigentlich kaum noch, hier Zeit-und Temperaturangaben zu machen, da mein Ofen in letzter Zeit relativ  – ich sag mal … eigenmächtig agiert. Daher verbringe ich auch fast die gesamte Backzeit auf einem kleinen Hocker vor der Ofentür (was ich aber nebenbei gesagt sehr entspannend finde).

pita-brot mit schafskäse

Das Rezept für Pitabrot mit Schafskäse fand ich hier, ich hab es ein bisschen verändert. Dazu gab’s bunten Schnippelsalat aus Tomaten, Gurken, Paprika, Zwiebeln mit allerhand Kräutern, nämlich Dill, Petersilie, Schnittlauch und Kresse. War sehr gut. (Kann leider nicht mehr dazu sagen da ich noch so vollgefressen satt bin. )

Zutaten:

Teig:

  • 400 g Mehl (Type 550)
  • 1 Päckchen Trockenhefe
  • 200 ml lauwarmes Wasser
  • 1 TL Zucker
  • 1 TL Salz
  • 1 El Olivenöl

Füllung:

  • 150 g Feta
  • 1 Bund Frühlingszwiebeln, kleingeschnitten
  • 1 Zehe Knoblauch, kleingehackt
  • 1 EL gehackte Petersilie
  • 1 EL Olivenöl
  • 2 EL griechischer Joghurt
  • Salz und Pfeffer

Mehl, Trockenhefe, Salz und Zucker vermischen. Lauwarmes Wasser zugeben, zu einem Teig verarbeiten. Zehn Minuten kneten. Öl zugeben, weitere drei Minuten kneten. Teig ringsum mit etwas mehr Öl einstreichen, in zugedeckter Schüssel etwa eine Stunde gehen lassen. (Ab hier habe ich den Teig in den Kühlschrank und erst abends weiterverarbeitet.)

Teig ggf. wieder auf Raumtemperatur kommen lassen. In 12 Stücke teilen, Kugeln formen, diese nochmals etwa 15 Minuten gehen lassen.

Backofen auf 220°C vorheizen.

Für die Füllung Feta zerkrümeln, mit Frühlingszwiebeln, Knoblauch, Petersilie, Olivenöl und Joghurt zu einer geschmeidigen Masse rühren. Mit Pfeffer und Salz abschmecken.

Teigkugeln zu kleinen Fladen ausrollen (etwa 10-12 cm Durchmesser), in die Mitte der Fladen mit dem Handballen jeweils eine kleine Vertiefung drücken. Füllung darin verteilen.

10 – 12 Minuten backen.


orangen-zimt-strudelbrot

Am Wochenende verabredeten wir uns kurzfristig zum Nachmittagspicknick. Picknick heisst natürlich Kuchen, ich hatte allerdings so gut wie keine Zutaten im Haus. Früchte, Eier, Quark, Joghurt… alles Fehlanzeige. Also sollte es ein Hefekuchen werden, und ich wühlte mich bei Chili und Ciabatta durch’s Archiv. Die Wahl fiel dann auf das Orangen-Zimt-Strudelbrot, mit kleinen Änderungen. Sehr lecker, und wie Petra schon anmerkte ist das Orangenaroma toll (selbst wenn man, so wie ich, die Orangenschale wegläßt).

Zutaten:

Teig:

  • 405 g Mehl
  • 1 Päckchen Trockenhefe
  • 50 g Zucker
  • 1/2 TL Salz
  • 75 ml warme Milch
  • 75 ml warmes Wasser
  • 25 g Butter in Flöckchen
  • 80 ml Orangensaft

Füllung:

  • 50 g Zucker
  • 1 TL Zimt
  • 20 g zerlassene Butter

Guß:

  • 50 g Puderzucker
  • 2 TL Orangensaft

Etwa 1/3 des Mehles in eine Schüssel geben und die trockenen Zutaten hinzufügen. Wasser und Milch zugeben und zu einem flüssigen Teig verrühren. Butter und Orangensaft zugeben.

Das Mehl nach und nach zugeben und den Teig 8 Minuten kneten.

Den Teig zu einem Ball formen und ringsum leicht einölen. Die Schüssel mit Klarsichtfolie abdecken und den Teig etwa eine Stunde gehen lassen, bis sich das Volumen verdoppelt hat.

Den Teig zu einem Recheck ausrollen, die Breite soll etwa der Länge der Kastenform entsprechen (hier: 28cm).

Das Teigstück mit der zerlassenen Butter bestreichen. Zucker und Zimt mischen und darüberstreuen.Teig von der kurzen Seite her aufrollen und an den Seiten etwas einschlagen. Mit der Naht nach unten in die gebutterte Kastenform legen.

Die Form mit einem Tuch abdecken und das Brot nochmals etwa 45 Minuten gehen lassen.

20 Minuten vor dem Backen den Backofen mit einem Rost auf mittlerer Schiene auf 190°C aufheizen.

Die Brote 10 Minuten backen, dann die Temperatur auf 165°C reduzieren und weitere 30 Minuten backen (hier: zunächst 180°C, dann 10 Minuten bei 160°C, weitere 20 Minuten auf der untersten Schiene, mit Alufolie abgedeckt, dann nochmals fünf Minuten ohne Form, aber mit Alufolie – aber mein Ofen ist auch etwas zickig).

Die Brote aus dem Ofen nehmen und etwas abkühlen lassen. Zutaten für den Guss verrühren und auf dem Brot verteilen.

Auf diesem Bild erkennt man gut das von Petra angesprochene Problem der Löcherbildung im Brot, sofern man für die Füllung auch Butter verwendet. Aber es schmeckt halt so gut!

kakaós csigák – hungarian yeast pastry with cocoa

i jumped on the bandwagon and made Anikó’s kakaós csigák – hungarian chocolate rolls which were subject of numerous baking sessions (and almost as many enthusiastic praises) in german foodblogs. yeast pastry with chocolate is not common in germany – unfortunately, i have to say after trying these. i think the key to their deliciousness is to douse them with a lot of hot milk and butter during baking time, which makes them super soft and fluffy. i changed the recipe only a tiny little bit by using fresh yeast instead of dry yeast.

Ingredients:

dough

  • 20g fresh yeast
  • 500g flour
  • 50g soft butter
  • 300 ml lukewarm milk
  • 1 egg yolk
  • 4 tsp sugar plus a pinch
  • 1 pinch of salt

filling

  • 4 tsp cocoa powder
  • 8 tsp powdered sugar

to douse

  • 150 ml milk
  • 50g butter

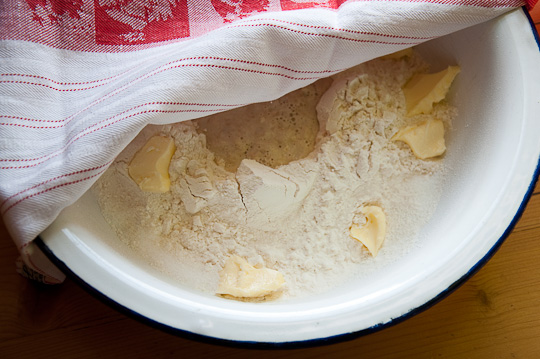
first pour flour, salt and sugar in a large bowl, make a well in the middle and cut butter around it. crumble yeast into the well, add a pinch of sugar and enough milk to cover the yeast. stir a few times, then cover it with a dish towel and let the sponge rise for about 15 minutes.

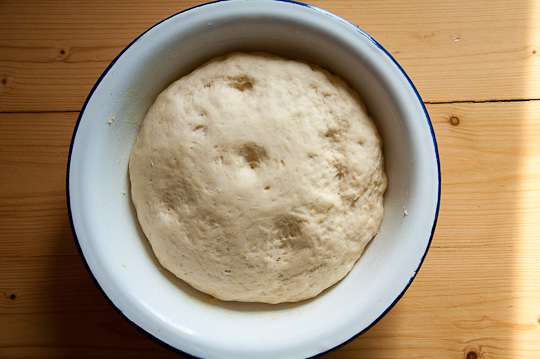
add remaining milk and the egg yolk, then knead the dough for a few minutes until it comes together (it is a bit sticky, you may want to use a bit less milk first, then add by the tablespoon).  cover the dough again and let it rise until the volume is doubled – this took about an hour. in the meantime mix icing sugar and cocoa for the filling. preheat oven to 175°C.

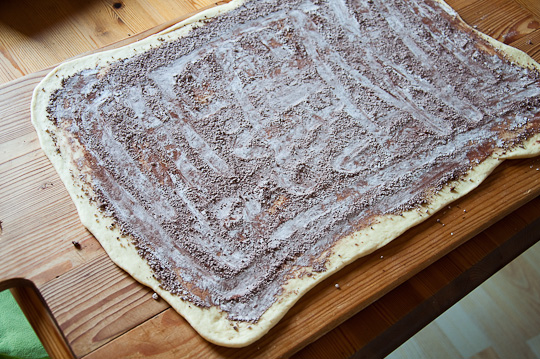
knead again a few times, then roll it out to a large rectangle.

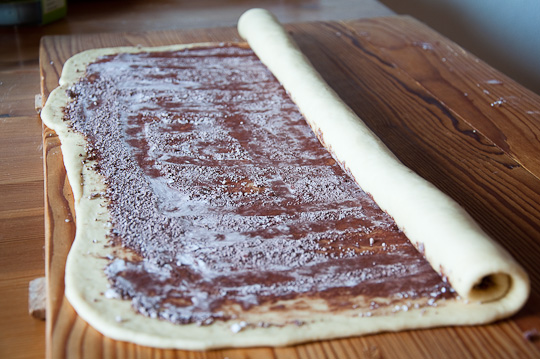
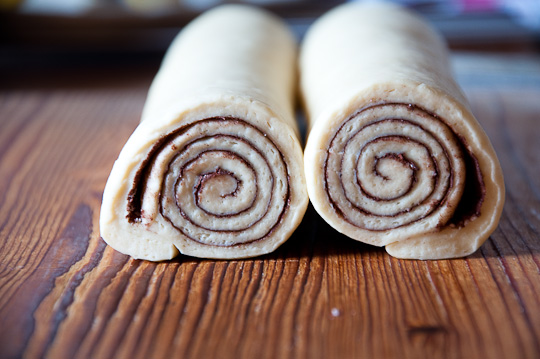
cover with the filling and roll it up, starting from the long edge.

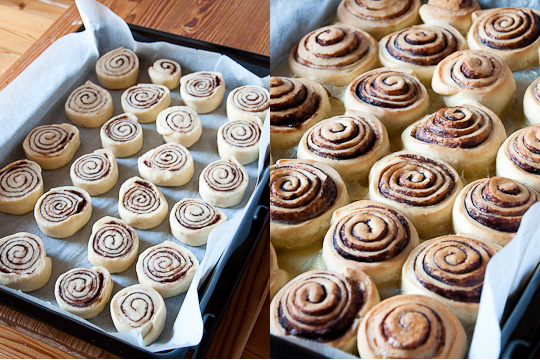
then cut in slices, approximately 3cm wide.

transfer the slices into a baking pan and bake at 175°C for 15 minutes. meanwhile heat the extra 150ml milk and melt the butter in it. pour the mixture over the rolls and bake for another 15 minutes.

my baking pan was a bit large, ideally they should cuddle up closely together after baking. anyway, they were divine.

ps: the hungarians are really serious about their kakaós csigák – there is an entire web site devoted to testing them: We Love Kakaóscsiga

yeast pastry with apple, almonds and pistachios

these swirls/rolls are made like this: in a large bowl mix 300g flour, 1/4 tsp salt, 35g sugar. make a well in the middle. crumble 20g fresh yeast into the well, sprinkle a knife tip of sugar on it and disolve the yeast in 150ml lukewarm milk. let it stand for a few minutes, until the yeast-milk-mix becomes bubbly. add  70g cold butter, cut in smaller chunks. knead well until the dough comes together nicely. cover with a dish towel and let it rise on a warm place for at least 30 minutes.  meanwhile prepare the filling: chop 30g of pistachios, grate one large apple. mix together with 3tbsp ground almonds, 2tbsp sugar and 3tbsp creme fraiche. when the dough is risen, knead again for a few minutes and then roll it out to a rectangle (approximately 25 x 45 cm). brush with 3tbsp of melted butter. then spread the filling on it. roll it up and cut in slices (about 3cm wide). put the rolls on a baking tray lined with parchment paper, cover again with a towel and let them rise for another 30 minutes. brush with 1tbsp melted butter mixed with 1 tbsp milk (which i used) or 1 egg yolk mixed with 1 tbsp milk. bake at 180° for 20 minutes or until golden brown. i like these rolls especially because they are very fluffy, and the filling is moist and not to sweet.

BreadBakingDay #28 - last day of submission April 1, 2010this is a sumbission to bread baking day, an event created by zorra and hosted this month at tangerine’s kitchen.

rosemary focaccia

rosemary focaccia

if i only had known before how easy it is to make great italian bread! after the ciabatta a few weeks ago i tried focaccia today. the recipe was compiled after checking here and and once again at delicious days: dissolve 20g fresh yeast in 250ml lukewarm water, add a knife tip of sugar. mix 275g flour (type 550) with 1tbsp rosemary and 1tsp ground sea salt. add half of the flour-mix and 1tbsp olive oil to the yeast-water-mix and stir for 2 minutes. add the remaining flour and stir again for 4 minutes, it’s ok if it is quite sticky. about the rising: it is important to give the dough enough time, like up to 24 hours, preferably in the fridge. i let it rise on the counter for about an hour (that is: i forgot it there), by that time the dough had already almost doubled its volume. then i put it in the fridge for 6 hours. 2 hours before baking time i let it warm up in the living room (at 21°).  the finish: pour the dough on a baking tray lined with lightly oiled parchment paper. try not to destroy the bubbles. use oiled fingertips to bring the dough in shape, you may also want to punch a few holes in it to make for the authentic look. mix 1tsp of coarse sea salt with 1tsp of rosemary and sprinkle on top of the foccacia. bake at 210° (or higher, but my oven is very hot…) for 15-20 minutes.

yes, this is really delicious. but what was the first reaction from my fellow eater? “i thought you were going to make it with olives!” and after like five slices “hm. i’m thinking the whole time how it would taste with olives…”. well, you are welcome to give it a try. here is the recipe.

piroshki? empanadas? poğaça?

the request for dinner today was “something stuffed with vegetables”. for the yeast dough i used 500g flour, 100ml lukewarm milk, 100 ml sun flower oil, about 70ml lukewarm water, 1 tsp salt, 20g fresh yeast. i had two different fillings: one with 200g leaf spinach, sautéd with one clove of garlic, and 100g feta cheese. the second filling was made from two tomatoes, cooked with olive oil and origan for about 20 minutes, 100g feta cheese and 3 tbsp tomato paste. served with yoghurt mixed with chive, parsley, salt and black pepper.

ensaïmada

ensaimadas

having never been to mallorca so far i also did not know about Ensaïmadas de Mallorca , which are obviously something like a national treasure. i stumbled upon the recipe here and tried them this morning (started actually last evening, since they are supposed to rise overnight). i made only half the amount of the recipe. and i used butter instead of lard – i guess that’s the reason why i found them nice, but not as spectacular as i had expected. note to self: go check out the original on-site.